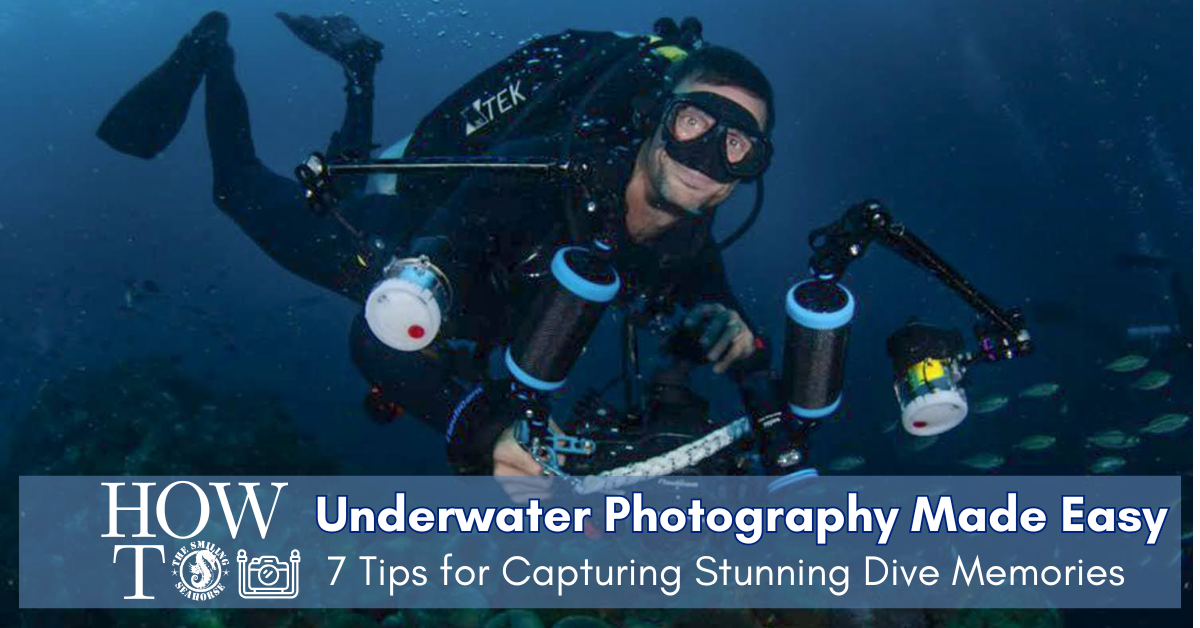
How to Take Stunning Underwater Photos: 7 Pro Tips for Breathtaking Dive Photos
Underwater photography is one of the most rewarding yet challenging forms of photography. It requires technical knowledge, patience, good diving skills and an understanding of the unique environment you are working in. Whether you are capturing the majesty of coral reefs, tiny nudibranchs, colourful reef fish or the larger wonders of marine life, there is always something new to learn.
Unlike photography on land, underwater photography adds several extra challenges. You are working with changing light, suspended particles, movement, limited bottom time and a camera enclosed inside a housing. At the same time, you need to remain aware of your buoyancy and make sure that your photography does not damage the environment you have come to photograph.
So how do you take better underwater photos? Here are seven practical tips to help you improve your technique and capture more striking images on your next dive.


1. Prepare Your Gear
The first step in successful underwater photography is making sure you have the right gear and, just as importantly, making sure that gear is ready for the dive. A camera system is only useful if the housing is properly sealed and everything is working before you enter the water.
Use a Leak-Proof Underwater Housing
Your camera must be protected by a waterproof housing capable of handling the depth you plan to reach. Before diving, check that your housing is rated for your planned depth and inspect it carefully for anything that could compromise the seal.
The golden rule of underwater photography is simple: keep your camera safe and dry. If your housing has a vacuum valve and pump, using them is a reliable way to verify that the housing has a good seal before entering the water. If you do not have one, carefully inspect the O-ring for wear, dust, hairs or anything else that could prevent a proper seal.
A small leak can ruin your camera equipment, so double-check every time you open and close your housing. It is much easier to spend a few extra minutes checking your housing on the boat than to discover a problem underwater!
Choose the Right Lens and Accessories
Your choice of lens should match the subject and the type of dive you are planning. Wide-angle lenses are ideal for sweeping underwater landscapes, reef scenes and large marine animals, while macro lenses are perfect for close-up photographs of smaller creatures such as nudibranchs.
Depending on your setup and photographic style, accessories such as a tripod, filters, snoot and strobes can also make a significant difference to your images.


Camera Settings for Stunning Underwater Photography
When you begin your underwater photography journey, starting with Auto or Program mode can be a great way to ease into taking pictures without being overwhelmed by manual settings. However, if you want to take your photography further, learning to adjust your camera settings manually will give you much more control over your images.
Understanding aperture, shutter speed and white balance is particularly important because each one affects the final photograph in a different way.
Aperture
The aperture controls the amount of light entering the camera through the lens. It also has an important effect on depth of field, or the area of the image that remains in focus.
To experiment, choose a steady subject such as a nudibranch or clam and set your aperture to a high number such as f/11. Get close, focus and take a photograph. You should see a relatively sharp subject with a less defined background.
Now reduce the aperture to a lower number, such as f/2.8, while adjusting your shutter speed to maintain the correct exposure. Take the same photograph again. The result should have a more blurred background, helping to isolate the subject.
Shutter Speed
The shutter speed determines how long the camera sensor is exposed to light. A faster shutter speed, such as 1/250th of a second, lets in less light, while a slower shutter speed such as 1/60th allows more light to reach the sensor.
Try photographing a subject against a blue background, such as a diver or coral. Set your aperture somewhere around f/5 or f/6 and begin with a shutter speed of 1/250th of a second. Take the photograph and observe the background.
Then reduce the shutter speed to 1/60th of a second and photograph the same type of scene again. The brighter background can produce a more vivid blue. Experimenting with aperture and shutter speed together will help you understand how exposure affects both your subject and the background.
White Balance
Underwater, colours tend to shift towards blue or green because water absorbs parts of the light spectrum as you descend. White balance helps compensate for this and can produce colours that look more natural.
- Underwater mode: Many modern cameras have an underwater white-balance preset that can automatically compensate for the underwater colour shift.
- External red filter: If your camera does not have a suitable underwater preset, an external red filter can help counteract the blue-green tint. However, filters can produce inconsistent results because they work best at certain depths and lighting conditions.
- Manual adjustment: Manually adjusting white balance according to your depth and lighting conditions gives you more control over the final colour of your photographs.
By practising these settings, you will gradually gain more control over exposure, depth of field and colour balance, allowing you to create more vibrant and natural-looking underwater photographs.


2. Understand Lighting and Water Conditions
Loss of Light and Colour
As you descend into deeper water, available light decreases and colours begin to disappear. Reds and oranges are among the first colours to be affected, followed by other parts of the visible spectrum.
This is why lighting is such an important part of underwater photography. Whether you are using a compact camera, a GoPro or a professional DSLR, understanding the available light will help you make better decisions about your settings and equipment.
Strobes can restore colour to subjects that have lost their natural appearance with depth, while a focus light can improve visibility when working in low-light conditions or during night dives.
For macro photographers, a wet diopter can make it possible to move between macro and super-macro photography without changing the main lens. If versatility is a priority, a 1.4x teleconverter can also extend the range of a wide-angle setup, allowing you to photograph subjects ranging from tiny nudibranchs to larger marine life such as manta rays.


3. Master Buoyancy and Stability
Before becoming an underwater photographer, you first need to be a competent diver. Good buoyancy control is essential not only for producing sharp, well-composed photographs but also for protecting the fragile marine environment.
Good buoyancy allows you to remain still and hover without unnecessary movement. This helps prevent camera shake and motion blur. The steadier you are, the easier it becomes to compose and focus your photograph.
Poor buoyancy can also stir up sand and other particles, creating backscatter — those annoying white specks that can appear throughout your images. Staying neutrally buoyant helps keep the water around your subject clear.
There is an even more important reason to work on your buoyancy: avoiding accidental contact with delicate coral reefs and other marine life. As an underwater photographer, you are more than just an observer — you are an ambassador of the ocean. Improving your diving skills and practising responsible photography helps you capture the underwater world without damaging it.


4. Composition and Framing Techniques
Just like any other type of photography, composition is key. The ocean can be a busy environment, so framing your subject effectively is vital if you want to create an impactful image.
Follow the Rule of Thirds
Positioning your subject off-centre can create a more dynamic and interesting composition. The rule of thirds is particularly useful underwater, where a subject can sometimes appear very small against a vast reef or seascape.
Use Leading Lines and Symmetry
Look for natural elements in the scene, such as coral formations or beams of light filtering through the water, that can lead the viewer’s eye towards your main subject. These lines can add depth and dimension to an image.
Get Close and Fill the Frame
Underwater photographs often contain a lot of negative space, which can make the subject appear distant and insignificant. Get as close as possible without disturbing the animal or its surroundings and use the frame to emphasise your subject.


5. Respect Marine Life and the Environment
Underwater photography offers a rare opportunity to observe marine life in its natural habitat, but with that privilege comes responsibility. Capturing a beautiful photograph should never come at the expense of the animal or the environment.
Do Not Disturb
Never touch, chase or harass animals simply to obtain a photograph. Doing so can cause stress and disrupt their natural behaviour. Maintain a respectful distance and allow the subject to approach you or continue with its natural activity.
Take only photos, leave only bubbles!
Avoid Damage to the Ecosystem
Be aware of where you place your hands, fins and camera housing. Fragile ecosystems such as coral reefs can be damaged by accidental contact. Good buoyancy and careful positioning make it much easier to photograph marine life without touching the reef.
Practise Ethical Photography
Do not force a photograph, especially if getting the shot means putting an animal or its habitat at risk. Ethical photography means capturing the beauty and serenity of marine life without causing harm or unnecessary stress.
Respecting the underwater world does not make photography less rewarding. Quite the opposite: learning to observe and wait for a natural moment can lead to much more interesting photographs.


6. Post-Processing
Capturing a great photograph underwater is only part of the process. Post-processing can help you bring out the best in an image and correct some of the limitations created by the underwater environment.
Correct Exposure and Contrast
Many underwater photographs can appear too dark or have washed-out colours. Adjusting exposure and contrast can bring back details and improve the overall depth of an image. Increasing shadows and highlights carefully can also help reveal details that are difficult to see in the original photograph.
Remove Backscatter
Backscatter occurs when particles suspended in the water reflect light from a strobe back towards the camera, creating bright specks throughout the image. Editing software can be used to reduce or remove distracting backscatter and improve the clarity of the photograph.
Enhance Colours
Colour correction can restore some of the vibrancy lost underwater, particularly in reds and oranges that disappear more quickly with depth. Adjusting white balance can also help produce more natural-looking tones.
Sharpen the Image
Subtle sharpening can bring out details, particularly if an image has been cropped or contains slight softness. Be careful not to overdo it, however, as excessive sharpening can give a photograph an unnatural appearance.


7. Practice and Patience
Like any form of photography, practice makes perfect.
Spend time underwater practising different techniques and learn from your mistakes. Some of the best underwater photographs come after numerous attempts, and every dive gives you another opportunity to experiment with composition, lighting, settings and subject behaviour.
Patience is equally important. Marine life can be unpredictable and perfect conditions may not present themselves immediately. Stay calm, keep your composure and do not rush your shots.
Sometimes the best photograph comes from simply waiting for the animal to do something interesting rather than trying to force the scene yourself.


Conclusion
Underwater photography allows you to capture the breathtaking beauty of the ocean, but it comes with its own unique set of challenges. By preparing your gear carefully, mastering buoyancy, understanding lighting and camera settings, and practising composition techniques, you can greatly improve your chances of getting that perfect shot.
Whether you are photographing coral reefs, tiny nudibranchs, colourful fish, frogfish, bowmouth guitarfish or larger marine animals, the possibilities are endless. The more time you spend underwater, the more you will learn about your equipment, your subjects and your own photographic style.
Most importantly, remember that the best underwater photographer is still a responsible diver. Take your time, respect the marine environment, avoid disturbing your subjects and, above all, have fun exploring beneath the surface.